Thursday, 9 November 2017

Module 6 Chapter 9

Decorated edges and borders.

I have made a few books in the past and used a variety of edges to decorate the borders.  I quite like doing them and they do make a finish to a book.  Here are some of ideas I use.

 
These borders are slightly different.  A friend has these plastic rubbing strips and I took some impressions using Markel sticks and they are quite nice.


Lace is very useful for borders.  The piece on the left has been dyed with transfer paints and is attached with two rows of running stitch which can be used on the reverse of the page but they are a bit wide apart for that.  The one on the right has been more carefully attached with small stitches at each end of the opening.  Again, not necessarily suitable on the reverse as the stitches are large on that side but they could have another thread wound through them.  The piece on the right has a fancy thread couched down.  Definitely not suitable on the reverse for showing so I would glue two pages together.  The two rows of running stitch are threaded with another coloured thread to make an attractive pattern. This is useable on the reverse as the two rows match each other.

On the left I have painted a design which decorates one side of the page but leaves the reverse blank.  The right hand side has fabric folded over the edge and stitched down.  This creates an identical edge on the reverse.  On the right I have done a single row of running stitch to show how it just finishes the page and the reverse is identical.  On the right hand side I have torn the edge then added the piece I tore away, reversing it so that it fits in different places.  This is glued to the reverse but is not unsightly so it could be used decoratively. 
Unfortunately I had glued these pieces into my sketchbook before I realised I should have photographed the reverse sides.  I did think not to glue in the areas where I might want to turn it over in the future and look at the other side but I can't hold them back and photograph them.  This was a useful exercise to do, giving me a number of ideas I can look back on at a later date.

Module 6 Chapter 8

Photographs and Photocopies

I'm not really all that keen on using photographs in stitch work, I find it a bit hard edged but I have used it on a couple of occasions.  Working with paper prints is a bit different though, you can work onto a paper background which works in with the photos and copies.

I started by printing off some of my photographs. 


The one on the left is printed on ordinary printer paper and the one on the right is printed on Khadi paper which is quite thick and is a fingers crossed job when it goes through the printer.  It absorbs the colour better and is much brighter than the printer paper.  Also, the sepia effect looks more like an old print on this paper.  I am keeping these two as I may use them in my book.


The top left picture is a cyanotype effect and the top right is daguerreotype of the same photograph as in the bottom right.  The bottom left is a photograph taken elsewhere in the valley and I have isolated an area and enlarged it below.


I used the photograph of the squirrel for a pattern of squares which is brilliant for enlarging a picture.  Saves all that measuring and ruling lines.  The top right is a kaleidoscope pattern of the cow parsley photograph and the ripple effect below is the same photograph.

I then had a play with a few of these.


Here I have cut the cyanotype and the daguerreotype pictures into strips and woven them together.


The background is a sepia photograph and the coloured piece is a different photograph stuck on top. This could be done with lots of different shapes to create different patterns.  I quite like the effect.
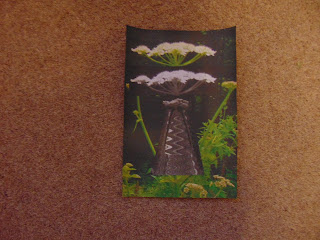
Here I took the smaller photograph of the group of cow parsley and cut it into random shaped strips.  I then glued them to the enlarged photograph of the single plant and arranged them like stalks.  I quite liked this one.

 
Here I had another play with the cow parsley.  Another colour copy of the single plant which I then photocopied in black and white.  I cut the flower off and glued it under the coloured one.  I then took a photocopy of the ripple effect photograph.  I cut a smaller flower from the side of the main one and glued that underneath and then a smaller version of the ripple on top of that creating this stacked image.
 
Photocopying my photographs uses a lot of ink and I tried to do one onto a transparent sheet but there was too much ink and it wouldn't dry.  I ended up with ink on everything. To make it easier, I took two of my earlier photographs and make a colour copy and a black and white one which I then cut into matchsticks and dropped onto the page.  These were then glued where they landed.
 

This was done in my sketchbook. I then took two photocopies of this piece of work.
 The first I used here.  I did some hand drawn lettering and used a mixture of photocopies which I then colour washed   in yellow.  I was being lazy not putting the computer on to create some smart lettering so I'm not very happy with this one.

Here I have used the matchstick print to make a border around a copy of a photograph.  The border seems to pick up the fencing and make it stand out more. 
 
Not sure about this chapter.  I'm still cautious about photographs and especially photocopies but I might use something in my final book.